

Free Disk2VHD Hyper-V VHDX Physical to Virtual Conversion P2V

Update 2017: Forget Disk2VHD, there is something much better. Check out BackupChain and its P2V, V2V, and V2P features. It offers VHD, VHDX, VMDK, and VDI formats as source and target virtual disks. Converts several disks and runs as a task automatically if you want…and much more!
Physical to virtual P2V Hyper-V conversion for Hyper-V Server 2016 (and older versions) can be done in just a couple of simple steps.
Converting a physical machine to a virtual machine may be done “live” using the VSS (Volume Shadow Copy Service). A common tool provided by Microsoft, though a little primitive and buggy, is Disk2VHD available here.
First Steps using Disk2VHD
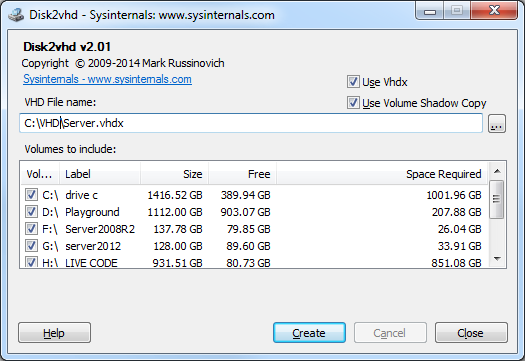
The screen shot below shows a typical setup where you would select all necessary partitions on your server for P2V conversion. The physical hard drive will then be converted into a single VHDX file for each physical disk. The great thing about VHDX is you can grow beyond 2TB, which is the limitation of the VHD virtual disk format.
Use the options as shown below and click “create”:
Command line:
The Disk2Vhd tool may be scripted, too. You could create a batch file (convert.bat) using the following command:
Usage: disk2vhd <[drive: [drive:]…]|[*]> <vhd file>
Example: disk2vhd * d:\vhdx\myserver.vhdx
The asterisk (*) includes all drives automatically; otherwise, enter the drive letters separately.
Setting up and Booting your New P2V Hyper-V Virtual Machine
Now basically we follow the common steps required of setting up a new VM in Hyper-V Server 2012 / R2 when only a VHDX file is present.
At the very least all you need is the VHDX file with the operating system on it. All other settings may be entered manually at any time.
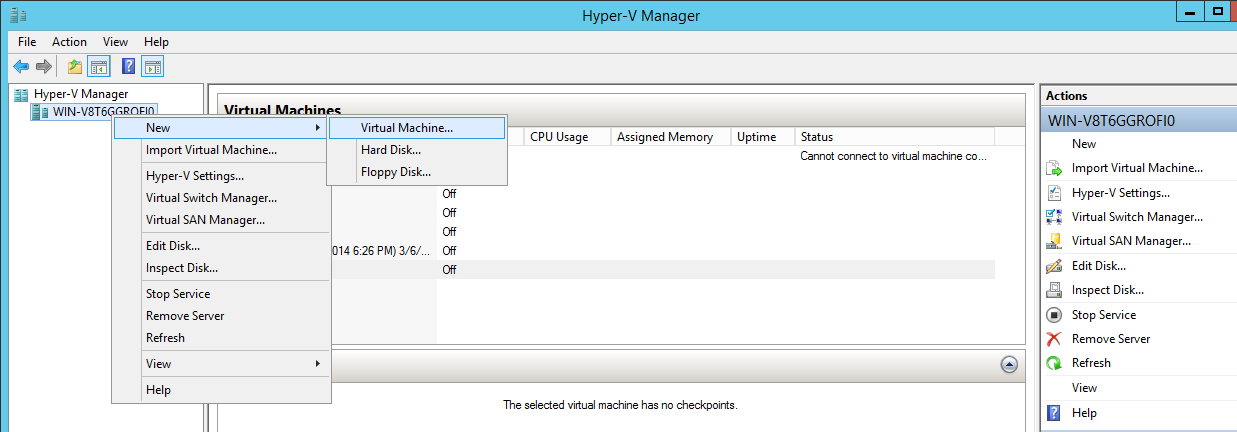
We go to Hyper-V Manager and click “create new virtual machine” as shown here:
Then click next on the following boilerplate screen:

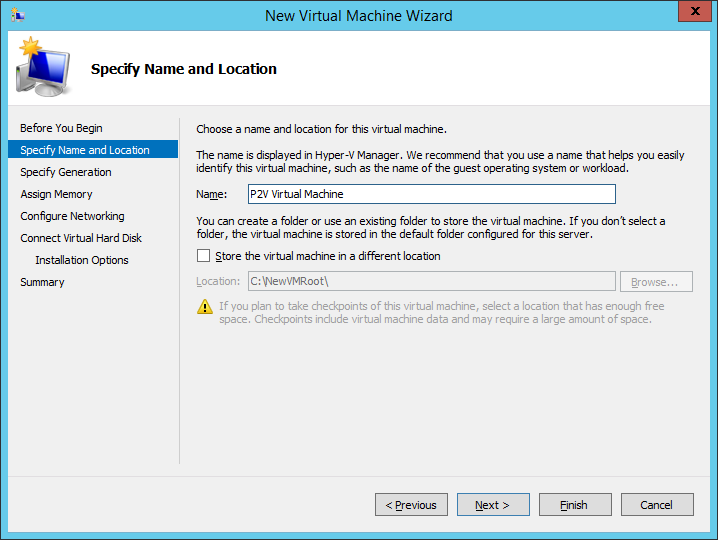
Now enter a name for the new VM:
Now comes the important part: enter the path to the VHDX file of the physical to virtual converted machine. This was either a VHD or a VHDX file created by Disk2Vhd earlier:
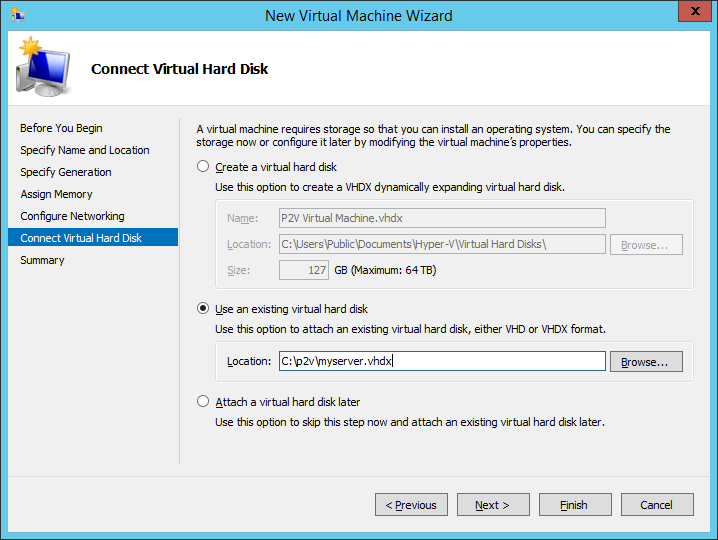
Click next until the wizard completes:

Congratulations! Now boot up the VM and fine tune Hyper-V settings as needed. In addition, you’ll want to install the Hyper-V Integration Services since it is important to have them up to date at all times. See this article
Don’t forget to add your new VM to your Hyper-V backup task in BackupChain so it’s automatically backed up:

Conclusion
Disk2Vhd is a basic, primitive, but easy to use tool for P2V Hyper-V (physical to virtual) conversions of servers and PCs. The VHD and VHDX files created by Disk2Vhd can easily be mounted in Hyper-V.
The same VHD may also be installed on other virtualization platforms, such as Microsoft Virtual Server 2005 or Virtual PC 2007, if you are still using them.
All three, Hyper-V, Microsoft Virtual Server 2005, and Virtual PC 2007 can be backed up using BackupChain, which provides dozens of specialized features for virtual machine backup.
Backup Software Overview
BackupChain Server Backup SoftwareDownload BackupChain
Cloud Backup
Backup VMware Workstation
Backup FTP
Backup VirtualBox
Backup File Server
Hyper-V Backup
Backup Hyper-VPopular
- Hyper-V Links, Guides, Tutorials & Comparisons
- Veeam Alternative
- How to Back up Cluster Shared Volumes
- DriveMaker: Map FTP, SFTP, S3 Site to a Drive Letter (Freeware)
Resources
- Free Hyper-V Server
- Remote Desktop Services Blog
- SCDPM Blog
- SCOM Blog
- V4 Articles
- Knowledge Base
- FAQ
- Sitemap
- Backup Education
- Backup Sichern
- Hyper-V Scripts in PowerShell
- FastNeuron
- BackupChain (Greek)
- BackupChain (Deutsch)
- BackupChain (Spanish)
- BackupChain (French)
- BackupChain (Dutch)
- BackupChain (Italian)
Backup Software List
BackupChain
Veeam
Unitrends
Symantec Backup Exec
BackupAssist
Acronis
Zetta
Altaro
Windows Server Backup
Microsoft DPM
Ahsay
CommVault
IBM
Other Backup How-To Guides
- 8 Tape Backup Disadvantages and Issues You Need To Know
- Hyper-V Manager: Scheduled Snapshot and Checkpoint Creation
- How to Delete VSS Shadows or Snapshots
- Windows 11 Final Release Free ISO Download Links
- How to Backup a Hyper-V VM Remotely Online
- Windows Server 2012 Failover Cluster Important Updates
- Download Links for Windows 10 & Windows Server Technical Preview
- Is My Hard Drive Failing? Signs of Hard Drive Failure
- Azure Stack HCI ISO Download for Free
- How to Convert from Dynamic VHD/VHDX Disk Format to / from Fixed in Hyper-V
- How to Easily Move VHD / VHDX to New Server, Disk, NAS, Cloud
- 13 Hyper-V Cluster Shared Volume Tips & Tricks
- 0x800705aa How to Fix ERROR NO SYSTEM RESOURCES
- 4 Things You Need To Know About Hyper-V Integration Services
- Slow Cluster Shared Volume–Tips to Speed Up CSV and Backups
- How to fix error CLSID {463948d2-035d-4d1d-9bfc-473fece07dab} Access Denied
- How to Backup a Virtual Server While Running
- The Ultimate Hyper-V PowerShell Commands Cheat Sheet
- KB 2885541 Packet sniffing tool does not sniff all network traffic through port mirroring on Windows 2012 Server VMs
- Resolving VSS_WS_FAILED_AT_FREEZE Backup Errors